GENERAL COOLING SYSTEM SERVICING
1988 Jeep Cherokee
GENERAL INFORMATION
General Cooling System Servicing
* PLEASE READ THIS FIRST *
The following article is for general information only.
Information may not apply to all years, makes and models. See specific article in the ENGINE COOLING section.
DESCRIPTION
The basic liquid cooling system consists of a radiator, water pump, thermostat, electric or belt-driven cooling fan, pressure cap, heater, and various connecting hoses and cooling passages in the block and cylinder head.
MAINTENANCE
DRAINING
Remove radiator cap and open heater control valve to maximum heat position. Open drain cocks or remove plugs in bottom of radiator and engine block. In-line engines usually have one plug or drain cock, while "V" type engines will have 2, one in each bank of cylinders.
CLEANING
A good cleaning compound removes most rust and scale. Follow manufacturer’s instructions in the use of cleaner. If considerable rust and scale has to be removed, cooling system should be flushed. Clean radiator air passages with compressed air.
FLUSHING
CAUTION: Some manufacturers use an aluminum and plastic radiator. Flushing solution must be compatible with aluminum.
Back Flushing
Back flushing is an effective means of removing cooling system rust and scale. The radiator, engine and heater core should be flushed separately.
Radiator
To flush radiator, connect flushing gun to water outlet of radiator and disconnect water inlet hose. To prevent flooding engine, use a hose connected to radiator inlet. Use air in short bursts to prevent damage to radiator. Continue flushing until water runs clear.
Engine
To flush engine, remove thermostat and replace housing. Connect flushing gun to water outlet of engine. Flush using short air bursts until water runs clean.
Heater Core
Flush heater core as described for radiator. Ensure heater control valve is set to maximum heat position before flushing heater.
REFILLING
To prevent air from being trapped in engine block, engine should be running when refilling cooling system. After system is full, continue running engine until thermostat is open, then recheck fill level. Do not overfill system.
TESTING
THERMOSTAT
Visually
inspect thermostat for corrosion and proper
sealing
of valve and seat. If okay, suspend thermostat and thermometer
in
a 50/50 mixture of coolant and water. See
Fig. 1. Do not allow
thermostat
or thermometer to touch bottom of container. Heat water
until
thermostat just begins to open.
Read
temperature on thermometer. This is the initial
opening
temperature and should be within specification. Continue
heating
water until thermostat is fully open and note temperature.
This
is the fully opened temperature. If either reading is not
to
specification, replace thermostat.
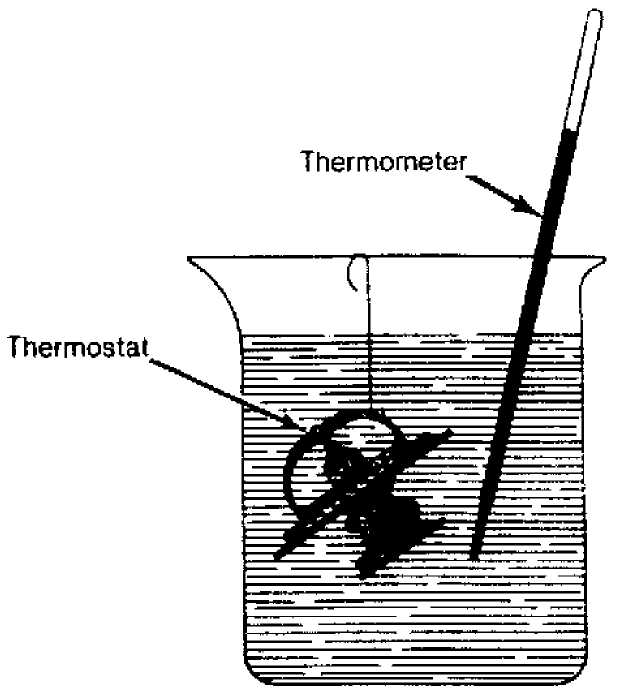
 Fig.
1: Testing Thermostat in Anti-Freeze/Water
Solution
Fig.
1: Testing Thermostat in Anti-Freeze/Water
Solution
PRESSURE TESTING
A pressure tester is used to check both radiator cap and
complete cooling system. Test components as follows, following tool manufacturer’s instructions.
Radiator Cap
Visually inspect radiator cap, then dip cap into water and connect to tester. Pump tester to bring pressure to upper limit of cap specification. If cap fails to hold pressure, replace cap.
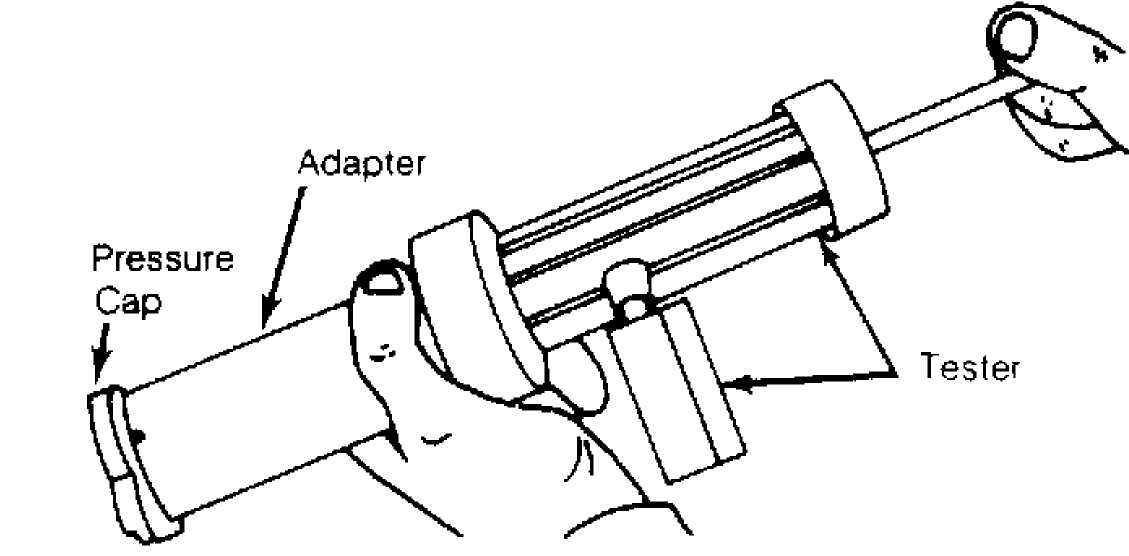
Fig. 2: Testing Radiator Pressure Cap
Cooling System
With
engine off, wipe radiator filler neck seat clean.
Fill radiator
to correct level. Attach tester to radiator and pump
until
pressure is at upper level of radiator rating.
If
pressure drops, inspect for external leaks. If no leaks
are
apparent, detach tester and run engine until normal
operating
temperature is reached. Reattach tester and observe. If
pressure
builds up immediately, a possible leak exists from a
faulty head
gasket or crack in head or block.
NOTE: Pressure may build up quickly. Release any excess pressure or cooling system damage may result.
3) If
there is no immediate pressure build up, pump tester to
within
system pressure range (on radiator cap). Vibration
of gauge
pointer indicates compression or combustion leak into
cooling system.
Isolate leak by shorting
each spark plug wire to cylinder block. Gauge
pointer
should stop or decrease vibration when leaking cylinder is
shorted.